scripting with druid
Scripts are the little programs crow runs to take on different roles in your synthesizer. They are written in Lua and typically run between 10 and 100 lines. You don’t need to write them from scratch though! There’s examples to upload directly, and modifying existing scripts is a nice soft entry into writing your own.
crow stores a single script in memory at any given time, and it will automatically start it whenever you turn on your synth. When you first turned on crow it was running First, which is a script too! We’ll be uploading new scripts that stop First from running, but never fear it’s easy to return if you desire (read on!).
If you haven’t already, please install druid on your machine using these docs.
This tutorial has three stages:
Stage One covers:
That is all you’ll need if you don’t want to write your own scripts!
If you wish to venture on from there, Stage Two demonstrates:
And Stage Three concludes with a brief introduction into writing & modifying crow scripts.
sections
Stage One: upload
Bowery
Before we can upload a script, we need some scripts to upload! There’s a set of examples, and a growing collection of user-provided scripts available in the bowery repository.
Navigate to bowery and download the repository as a .zip file. Unzip it wherever you’d like to keep your crow scripts.
Return to your terminal & quit druid by typing q then <enter>. Now in terminal, change-directory (or cd) to enter the bowery folder. If you unzip within your Documents folder it would be cd ~/Documents/bowery-main.
Having trouble using the cd command?
- Mac: right click the unzipped
bowery-mainfolder and then press the OPTION key. This will reveal a Copy “bowery-main” as Pathname action. Select it and then paste into terminal aftercd [spacebar]. - Windows: hold the SHIFT key and right click the unzipped
bowery-mainfolder. This will reveal a Copy as path action. Select it and then paste into terminal aftercd [spacebar]. - Linux: right click the unzipped
bowery-mainfolder and select “Copy”. Then, simply Paste into terminal aftercd [spacebar].
uploading
From the bowery-main folder, load up a fresh druid session so we can talk to crow.
druid
Your cursor will be at the bottom of the screen after > awaiting your input. The large empty window above the ////s is the ‘console’ and this is where we’ll see responses from crow.
Upload the clock divider example by typing u clockdiv.lua and you’ll see:
> u clockdiv.lua
 uploading clockdiv.lua
User script updated.
Running: clock divider
You just uploaded your first crow script!
Patch a trigger or LFO into input 1 and crow will now be sending clock divided gates to all 4 outputs. Try patching crow’s outputs to anything expecting triggers. Make some envelopes with Just Friends’ trigger inputs in shape/transient mode, or ping Three Sisters’ filters by patching crow’s outputs directly to Three Sisters’ 4 input jacks and turn quality up to 3:00 on the dial.
A voltage into input 2 will select between different sets of divisions as you sweep from -5V to +5v. Open bowery-main/clockdiv.lua in a text editor and edit the table called divs which represents the clock-divisions per output, with 5 different sets to choose from.
Any time you make changes to clockdiv.lua you’ll need to run the script again with r clockdiv.lua. If you want your changes to stick around when you restart crow change r (run) to u (upload) like this; u clockdiv.lua. We recommend you use r most of the time as it’s faster, then once you settle on something you like use u to save it into crow’s longterm memory.
This is all you need to work with existing scripts! Plenty of fun is to be had playing with the files in the bowery/ folder alone.
in review
| command | ~> | meaning |
|---|---|---|
| r filename.lua | run filename.lua | |
| u filename.lua | upload filename.lua to crow’s longterm memory | |
| p | print currently running script | |
| h | access help menu | |
| q | quit druid |
Using the h command in druid will print the above list anytime you need a refresher!
If you want to use a script you see online, you’ll need to save it as a text file in a folder of your choosing, cd to that folder, open druid and then run it as before with r a-cool-script-i-found.lua. We’ll be adding more examples, and accept community contributions into the official bowery repo.
Note: Occasionally you might see druid complain about errors after calling r. Wait a couple seconds & try again. If you still have problems, enter ^^kill to reset crow, then r again. Learn more about Environment Commands here
Stage Two: execute
split screen
Onward! It’s time to start working with scripts, and see how they work with druid.
Enter the text editor! Use whatever works for you, but something with syntax highlighting will help you avoid typos & syntactic errors. Atom is a good open-source option that runs on all major platforms.
Speaking of tools, your coding terminal doesn’t need to be a squinty struggle either. Take a moment to explore the preferences of your terminal application and adjust the font / colours so your eyes aren’t bleeding!
Now load both these tools up and, resize the windows so you have them side-by-side, something like these examples:
(druid & sublime text) 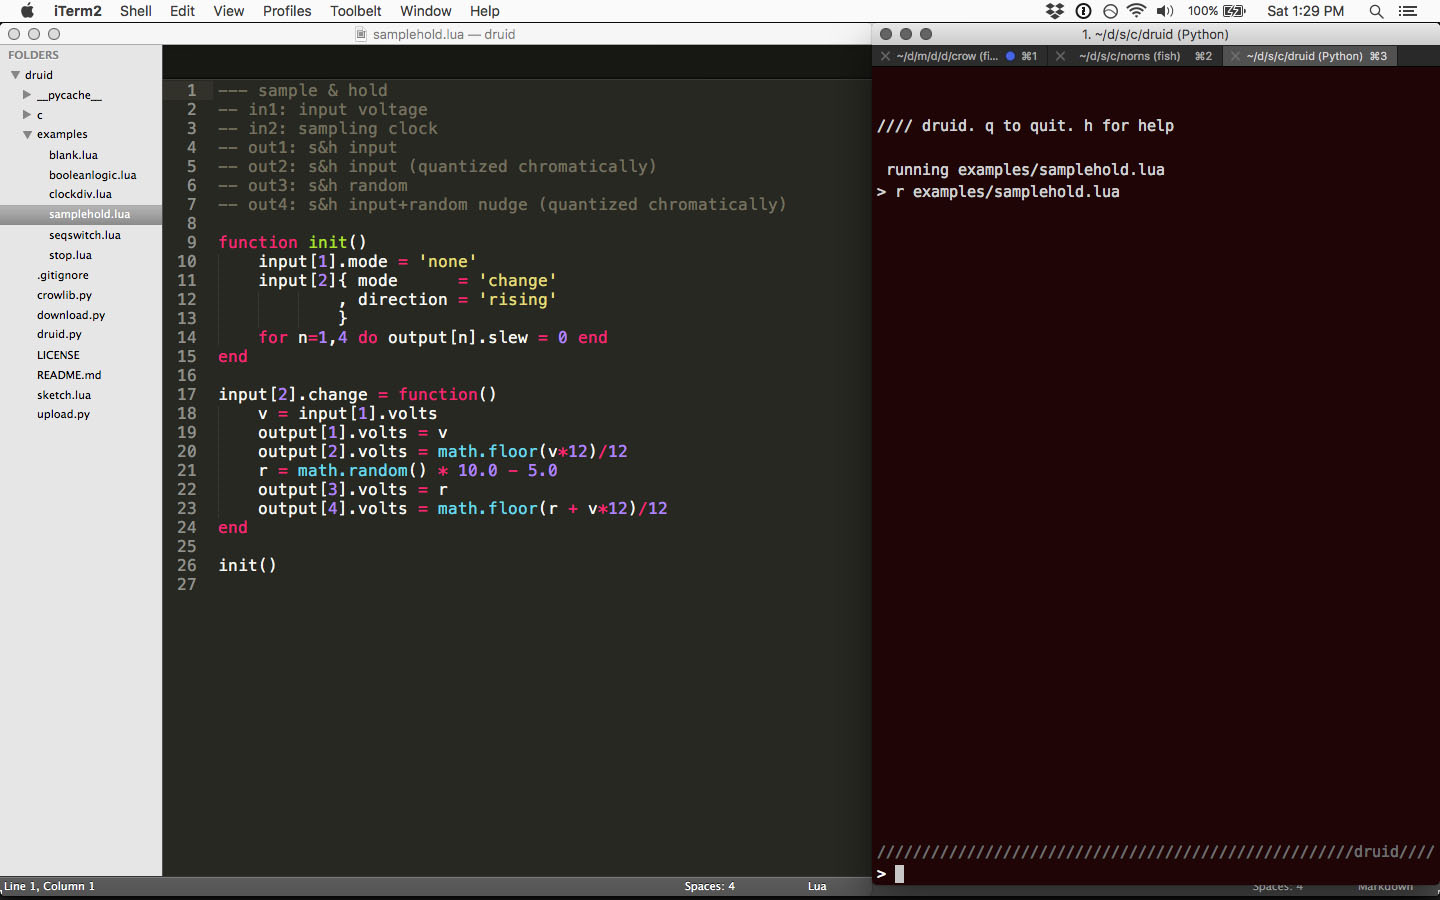
(druid & vim) 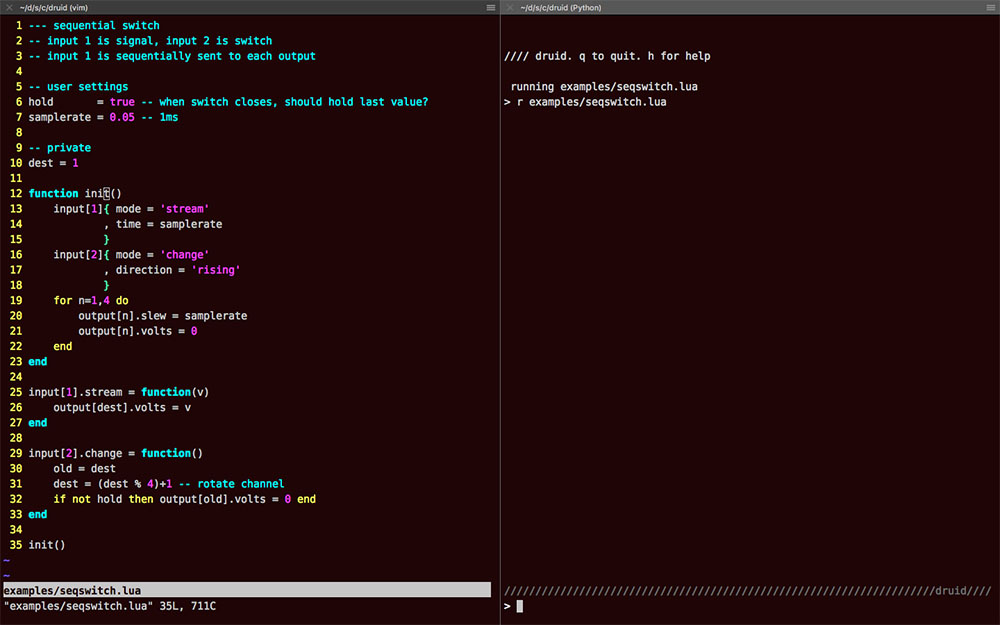
You’ll want to learn the hotkey that allows you to switch focus between the two programs.
say hello
nb: From here on, whenever you see the > symbol, that means you’ll be entering it into druid, and the lines that follow are what you’ll see returned from crow.
Before trying to do anything fancy, we’ll need a blank slate to work with. To do that, call crow’s reset function to return to the default state:
> crow.reset()
Now ask crow to say hello:
> print('hello')
You should see your request, along with crow’s response in the console:
> print('hello')
hello
The quotes around 'hello' tell crow that this is a string and not a variable. Strings are like text: what-you-see-is-what-you-get. Variables on the other hand, are names that have data associated.
Create a variable value and make it equal to 3:
> value = 3
To make sure crow understood, ask it to print the value of value:
> print(value)
3
crow remembered our number! Now we can do things with it. How about some arithmetic:
> print(value + 1)
4
A calculator!
This pattern of using print to query crow’s memory will be central to understanding things as you progress. If you get stuck, try printing your variable names and see what values you get. If you see nil then you’ve likely made a typo somewhere.
pushing around the volts
Let’s make a quick patch:
- Plug an oscillator into your speakers and tune it to a bassy tone
- Patch crow’s output 1 into the pitch/frequency input of the oscillator
> output[1].volts = 1
The oscillator will jump up an octave in pitch. Here’s what’s happening:
outputmeans we’re controlling an output channel.[1]says we’re going to talk to the first output. Those square brackets are used to select an item in a list. Here you could change it from 1 through 4, selecting crow’s different outputs..this dot means we’re going to access something that is an element ofoutput[1]. In our case…volts = 1sets the static voltage of the output to be1which means 1 volt in crow.
Set it back to zero by changing the last number to 0:
> output[1].volts = 0
That’s a lot to type out! Instead, you can press the up-arrow in druid and the previous command will appear after the prompt so you can make small changes like changing that last number. Keep pressing up-arrow to explore your previous commands.
Give the output some movement by using slew, then up-arrow to go back to 1 volt:
> output[1].slew = 0.5

> output[1].volts = 1
The pitch will glide up to 1 volt again, smoothly fading for half a second.
Stage Three: write
sample and hold
Let’s make a basic sample and hold script which takes a clock on input 1, which then outputs a random voltage on output 1.
In your text editor, save a file called sketch.lua to the bowery/ folder. Copy and paste the following default layout:
--- sketch name
-- description

function init()
    -- startup things
end
- The first line is a special comment. When you run your script crow will read this line to tell the user what script it’s running.
- The following line is a comment just for reference (as are any lines starting with 2 or more dashes).
- Next we see a function called
initwhich currently only contains a comment, i.e. it does nothing for now. - The keyword
endcompletes the function definition.
We can now run the script in druid using the r command:
> r sketch.lua
 running sketch.lua
Running: sketch name
You’ll notice nothing happened though, and that’s because our script doesn’t do anything yet! Let’s update the comments at top to describe our desired behaviour - this is a great way to map out a script & can help find the solution:
--- sample & hold
-- in1: sampling clock
-- out1: random sample
Start by setting input 1 to accept a clock signal. For this we set the input to have a special mode called ‘change’. This mode waits for the input signal to pass above or below a threshold voltage, and generates an event whenever this happens. We’ll put it inside the init function so that it happens whenever the script begins:
function init()
    input[1].mode('change',1.0,0.1,'rising')
end
input[1]specifies the first input.mode(...)says we’re going to change the behaviour of the input'change'choose change mode, ideal for gates, triggers & clocks1.0sets the threshold voltage to 1V0.1sets the hysteresis voltage to 0.1V'rising'means we only care when our input goes high
These values for threshold and hysteresis are good defaults, so don’t worry too much about them. 'rising' is good for detecting triggers or clocks, but you can also use 'falling', or 'both' which is especially useful for gate inputs.
Our input is setup, but we currently aren’t doing anything when a change event is triggered by the input cable. When this event occurs, a function will be called allowing us to respond to the input. It looks like this:
input[1].change = function(state)
    -- do things
end
Copy this to the bottom of the script, and replace the comment with the print function to make sure the clock is being detected:
input[1].change = function(state)
    print('BOOP!')
end
Patch a clock source to input 1, then save the script and run it:
> r sketch.lua
 running sketch.lua
Running: sample & hold
...
BOOP!
BOOP!
BOOP!
Those BOOP! ‘s tell us the input is correctly setup and detecting the clock signal. Now rather than having crow shout at us, let’s create the elusive random voltage.
input[1].change = function(state)
    output[1].volts = math.random() * 10 - 5
end
output[1].volts = ...means we’re setting output 1’s voltage to whatever is on the right of the equals signmath.random()is a Lua function that returns us a random number between 0 and 1 (e.g.: 0.32347)* 10multiplies the random value by 10, so we have a 10V range (0-10)- 5subtracts five from our random value, so the range is (-5,5) volts
Save the script & run it in druid with r sketch.lua. Patch output 1 to the pitch of an oscillator and listen to the entropic melody…
If you’re having trouble, you can look at the file samplehold-basic.lua in bowery/ which replicates the work above.
make it a conversation
While building the above script, we just zipped through implementation and were only using druid to send our script to crow. It can be super useful to have crow send us some information while we work, or to try out commands as we go. For example, let’s add a variable and debug print to our change event to see what’s going on:
input[1].change = function(state)
    rand = math.random() * 10 - 5
    print(rand)
    output[1].volts = rand
end
Note how we first calculate the random voltage and assign it to the variable named rand (short for random). This means we can look at it with the print(rand) call before sending it to the output. Now when you save & run the script, you’ll see the random voltage printed in the console on every trigger.
When you’re confident the script is working as you please, it’s good practice to remove the print function as it creates a lot of noisy messages in the console. Do this now, and save & run as before.
We can also use druid to find out information about the inputs. The current voltage on input 2 can be printed with:
> print(input[2].volts)
1.175299
Patch a voltage source to input 2, then up-arrow + enter in druid a few times to see the value update to show the voltage changing.
This call to input[2].volts can be included in our sample & hold script too. For now the script just outputs a random value on output 1, but why not sample input 2 and send that to output 2:
input[1].change = function(state)
    rand = math.random() * 10 - 5
    volt = input[2].volts
    output[1].volts = rand
    output[2].volts = volt
end
Notice how the input voltage is saved in a variable volt then sent to output 2.
all the possibilities
This short script is already a nice sample & hold. It creates a random value and a sampled input value every time a clock is received. But there is so much more to be done! There’s an example of further possibilities in bowery/samplehold.lua using quantization, and adding some randomness to the input sample, but there are so many more options!
(Try adding some slew to the outputs?)
One great source of inspiration when it comes to sample & hold and other forms of randomness is the Buchla ‘Source of Uncertainty’ module, but for now that’s up to you to explore!
the never-ending story
More explorations will be here or around soon:
- Exploring the stream input mode
- Timing events with metros
- Assigning envelopes & modulations to outputs with asllib
- Communicating with other modules with the ii protocol
- Creating custom CV modulations with asl sequences
But for now…
further
The reference guide provides a table of crow-specific commands.
The FAQ holds a number of crow questions and answers.
Additional Lua references: